Being Prepared for Poisoning
By Brad Petrucci, from the Canyon View Stake
This is sometimes forgotten when planning for emergencies. Our focus is usually on other very
important things such as food and water storage, first aid, and various insurances. Some of
these things themselves may be the source of poisoning. More that 2 million poisonings are
reported each year across the country according to the Red Cross. Various poisons can effect
large areas and many people quickly. Many of them are preventable and the effects can be
lessened when we are prepared.
TYPES of Poisoning:
There are several different types and sources of poisoning. They can come from chemicals,
medications, cleaners, solvents, pesticides, gas (eg carbon monoxide), batteries, fumes (eg paint
sprays), and even food.
We can be exposed to them in various ways. They can be ingested, inhaled, injected, or
absorbed through the skin to name a few. Poisons are all around us in medications, household
products, especially cleaning products, gardening products (fertilizers, pesticides, etc), and pest
controls, along with construction materials. Upon occasion we hear of train derailments, oil
spills, or industrial plants burning that can spread poisons in large quantities over large
geographic areas quickly.
Precautions and Prevention:
Post poison control center phone number in a prominent place. National Poison Control
Center’s number is 800-222-1222.
Keep all chemicals and medicines locked up and out of sight.
Be careful when handling substances, chemicals, and cleaners. Use only in well
ventilated areas and wear protective clothing such as gloves, goggles, and a face mask.
Keep medicines in original containers.
Be careful not to overdose on medications whether prescribed or over the counter.
Check for drug interactions when you are using multiple medications.
Never use another person’s prescribed medications or medications that have expired.
Read product information and use only as directed.
Install a carbon monoxide alarm in hallways and sleeping areas. Test them on a
scheduled ongoing basis.
Have a currently stocked first aid kit close by.
Install kids’ locks on cupboard doors etc.
Some household items look enticing to a young child like laundry detergent packets.
Make sure these items are put where they cannot be accessed by a curious child.
Have all them items you need to shelter in place if told to do so by government
authorities. This could happen in case of train derailments, trucking spills, and the like.
Treating / First Aid:
How you treat someone who may have been poisoned depends on the person’s symptoms, age,
and the type and amount of substance that caused the poisoning.
Check the scene and person. Try to find out what poison was taken. Look for
containers and take them with you to the phone. Call the poison control center. The
national poison control center’s number is 800-222-1222. Be ready to describe the
person’s symptoms, age, weight, other medications being taken, and other information
you have concerning the person.
Call 911 if the person is:
Drowsy or unconscious
Having difficulty breathing or has stopped breathing.
Uncontrollably restless or agitated.
Having seizures.
Known to have taken medicines.
Other symptoms can include burns or redness around the mouth and lips, vomiting,
breath that smells like chemicals (paint thinner, gasoline, etc.), confusion or other altered
mental states.
Take the following actions until help arrives
If poison swallowed remove anything remaining in the mouth.
If poison on the skin remove contaminated clothing with gloves and rinse the skin
for 15 to 20 minutes.
If poison in the eye flush it with luke warm water for 20 minutes.
If poison inhaled get the person into fresh air as soon as possible.
Do not use syrup of ipecac or anything to induce vomiting. It may cause additional
harm.
If you have the product container follow the directions for poisoning printed on the
label.
If you suspect carbon monoxide poisoning get outside to fresh air immediately and
call 911. Its symptoms include headache, dizziness, weakness, nausea, vomiting
sleepiness, and confusion
Summarized: the treatment and first aid consists of calling the poison control center, following
their directions, and calling 911 or taking the person to the emergency room.
Much of the preparation is in the storage, proper use, reading of the directions on labels, and
having phone numbers posted in conspicuous places easy to find and use. Preparing for these
emergencies does not take a lot or money or time. It is something you can do with relative ease
and perhaps save a life. Keep in mind doing something, anything, no matter how small is
better than doing nothing at all. Good luck in all of your efforts.

Coping With Heat
Without some forethought and a little preparation, heat and its effects can become an emergency, even an extreme emergency. Each year it is estimated that 489,000 people in the world die from heat-related complications. In the United States there are some 2,300 deaths which the CDC feels is a gross underestimate.
What types of illness and dangers are there? The following is a synopsis of many of them along with their symptoms and the initial first aid treatment.
Heat Stroke (sometimes called Sun stroke though you can have heat stroke without being in the sun). This is when the body can no longer maintain a temperature of under 105. If not treated immediately, heatstroke can damage multiple organs and systems, including the: brain and nervous system, circulatory system, lungs, liver, kidneys, digestive tract, and muscles.
The symptoms of heat stroke include:
- Altered
mental state such as confusion, agitation, irritability, disorientation,
delirium
- Altered behavior such as slurred speech, staggering
- Seizures, coma
- Alteration in sweat leading to dry skin
- Headache
- Dizziness or lightheadedness
- Nausea and/or vomiting
- Flushed or reddened skin
- Rapid or fast breathing and heart beat
- Muscle weakness or cramps
Treatment
Call 911, this is the most serious form of heat injury. Don’t delay, it could be fatal.
While waiting for paramedics: move to air conditioned environment or at least the shade;
fan air over the victim while wetting their skin; apply ice packs to armpits, groin, neck, and
back; immerse in a shower or tub of cool water (not ice).
Heat Exhaustion is basically the same thing as heatstroke but of lesser magnitude.
Symptoms: Most of the symptoms are the same as heat stroke except the body temperature is between 101 and 104 F and the skin is pale not red. It is the precursor to heatstroke. Heat exhaustion occurs due to excessive water and salt loss from sweating while heatstroke is caused by the body’s inability to control its internal temperature.
Treatment:
Get out of the heat as quickly as you can. Drink some water to rehydrate and take steps to bring down your body temperature like getting in a tub of cold water. If you continue to feel sick or notice the other signs of heatstroke especially neurological symptoms such as confusion, stumbling or clumsiness call 911.
Rhabdomyolysis is a medical condition that is caused by heat stress and prolonged physical exertion. When rhabdomyolysis occurs, muscle tissues break down rapidly, die, and release electrolytes and proteins into the blood. If left untreated, Rhabdomyolysis releases high levels of proteins that can cause temporary or permanent kidney damage, seizures, irregular heart rhythms, and even death.
Symptoms include:
- Muscle cramps or pain
- A decreased range of motion
- Weakness
- Joint pain or stiffness
- Inability or reduced ability to perform physical exercise at the typical level or duration
- Abnormally dark-colored urine or decreased urine output
Treatment: if you or someone else is experiencing symptoms of rhabdomyolysis, seek medical attention immediately. Stop activity and drink water while you wait for medical attention to arrive.
Heat Cramps are muscle cramps or spasms that occur when your body lacks both salt and water. It’s possible to experience heat cramps even if you’ve been hydrating, because you may not be replenishing the salt levels in your body that deplete when you sweat. Heat cramps most commonly occur in the arms, legs, or abdomen.
Treatment: The best way to combat heat cramps is to:
- Move to a cooler place for at least a few hours
- Stop all activity
- Loosen clothing
- Drink 8 ounces of cool water or an electrolyte drink every 15 to 20 minutes
- Apply a cool wet compress to the cramping area
If your cramps do not begin to subside within an hour of these treatments, seek medical attention. If you have heart problems, or on a low-sodium diet, it’s also important to seek medical attention immediately. If not treated immediately, heat cramps can lead to heat exhaustion.
Heat Syncope is a heat-related illness that results in an individual’s collapse or loss of consciousness due to heat exposure. Unlike other heat-related illnesses, individuals experiencing heat syncope will not experience an increase in body temperature or a cessation of sweating.
Symptoms: If you are exposed to a warm, humid environment and are experiencing light-headedness from standing up quickly, or from prolonged standing, know that these are symptoms of heat syncope. Fainting for short durations and dizziness are also symptoms of heat syncope.
Treatment:
Sit or lie down in a cool area, slowly drink water or an electrolyte drink.
Heat Rash: is the least serious heat-related illness. It’s usually more uncomfortable than it is dangerous. This heat-related illness occurs when sweat is unable to evaporate from the surface of the skin, which can happen when you’ve spent long hours working and sweating in hot conditions.
Symptoms
Heat rash appears on the body in small red bumps, usually on the chest and neck, in the groin area, and in the elbow creases.
Treatment Heat rash is not a dangerous heat-related illness, but it is a good idea to hydrate and move out of the hot weather if you’re experiencing heat rash symptoms. To treat heat rash, you can take a cool shower and let your skin air dry. If the area is itchy or irritated, apply a cool compress.
Heat related illnesses can trigger sudden events such as heart attack or stroke. They also worsen existing medical conditions such as cardiovascular disease, diabetes, mental illness, kidney disease, and lung disease. So they should be taken seriously.
The best way cope with dehydration and the heat is through prevention and preparation. Here are some tips from the Red Cross:
- Drink plenty of fluids during outdoor activities or vigorous exercise.
- Schedule exercise for cooler times of the day.
- Don’t leave someone alone in a car.
- Be sun smart:
- cover
head with hat
- use sunscreen
- wear loose light colored clothes
- wetter is better: meaning doing something like drenching a T-shirt and wearing it
- take a cool shower
- take an umbrella and use it in the sun
- limit alcohol
- eat light meals with high fluid content (fruit, watermelon etc)
- know the risks and first aid.
- Always carry water in your car (perhaps a gallon jug in trunk).
It also helps to keep your house cool with swamp coolers, air conditioning, use fans with a bowl of water and ice in front of it, keeping the shades on the windows down and using cool bedding and pillows. Ceiling fans should be set to rotate counter-clockwise to change the airflow and create and wind chill breeze. Also planning meals to use the oven less (here microwave may be a good alternative).
To cool off people have also suggested things such as:
- put ice packs on pulse points (like wrist etc)
- freeze a wash cloth and put on your neck
- freeze and hug a water bottle
- sleep on the lowest level of your house
- sleep like an ancient “Egyptian” meaning wet the bed sheets and then sleep in them
- freeze and then use bed sheets
- freeze socks or bandannas and wear them
- eat smaller meals
There are many ways to get and stay cool and avoid heat illnesses. Think about them and make yourself and family a plan of what to do. As you can see, many of these things don’t cost a lot of money but do take some preparation. Be ready and keep safe. Always remember doing something, anything no matter how small is better than doing nothing at all. Good luck in your efforts and have a wonderful fun filled summer.
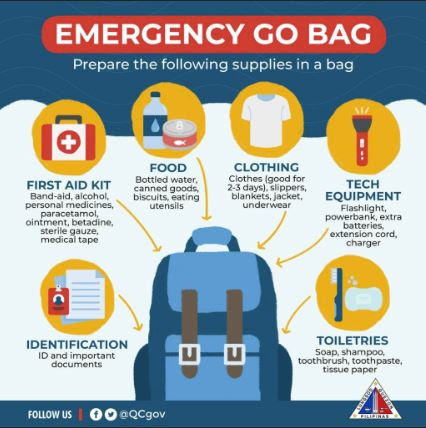
“Go Bags”
An essential in any emergency preparation is having supplies available to sustain life until help from family or community arrives and normal living conditions can be re-established. In unexpected widespread or major disasters or emergencies time is often of the essence and may require immediate evacuation. In these cases go bags fill the need.
What is a go bag? A “go bag” is a mobile emergency preparedness bag designed to provide survival essentials for a short term disaster. It is packed with items that are necessary for survival. It could provide life or death support. They are fairly small and light enough to be carried on your shoulder or back without undo strain. It is designed for one person so each person in the family needs to have one that they can carry. A common way is to use an ordinary backpack that is often used for school. Similar type bags can be used. Duffel bags may be too large and unwieldy for many, especially children.
What is the difference between a go bag and a 72 hour kit? The main difference is intent and duration. The intent of the go bag is to sustain you for a short time during a rapid exit. While a 72 hour kit is better suited for a shelter in place situation and is more comprehensive than a go bag and usually lasts longer. It therefore is heavier and harder to move especially in a rapid evacuation. However, with careful planning they may be combined into one bag.
Sandy City and the American Red Cross now strongly suggest that 72 hours kits be increased to 5 day kits. This is especially true for what we think of as disasters such as tornadoes, earthquakes, tsunamis, and hurricanes where devastation is so extensive that it may take substantial time to help those in need.
Food storage and supply storage is best used for personal emergencies such as illness, unemployment, accident etc. rather than 72 hour (5 day) kits. Some people have supplemented or lived off of their personal food storage for several months during these times.
So what is in a go bag? This depends on the members of your family. Each may be a little different depending on their needs and age. Here is a list of the main categories of things that you need with some examples. Using this you can then tailor the contents to the needs of each person.
- Personal needs: eye glasses, contacts, prescription medications, OTC preparations
- Clothing: a change of clothes based on the season, work gloves, poncho, hats
- Safety supplies: first aid kit, flash light, matches, whistle, scissors, emergency blanket, masks (Covid type), hand sanitizer
- Communications: battery/hand cranked radio, cell phone, phone cords and chargers
- Documents: birth certificate, Id’s, insurance policies, list of important phone numbers
- Food and Water: high energy compact foods, can opener, utility knife, 1 gallon of water per day per person
- Comforts: blankets, pillows, book/crayons, cards, cup with at least 5 dice (many games can be played using only dice example https://icebreakerideas.com/dice-games )
- Pet plan: locations that will accept them (mostly dogs, service animals)
- Misc: car keys, wallet, heavy duty tape, tarp, water purification (tablets or personal filters), cord, a few simple tools (screw driver, hammer)
Go bags should be in an easy accessible place so they can be grabbed on the way out the door without much thought or effort. Should be able to get them and be out the doors within a couple of minutes or less.
Don’t worry about doing all of them at once especially if you have lots of people in your family. Start with one and then do the next as you have time and money. If you persistently do this you will have one for each person in the not too distant future. Slow but sure wins the race. Always remember doing something, anything no matter how small is better than doing nothing at all. Good luck in your preparations.
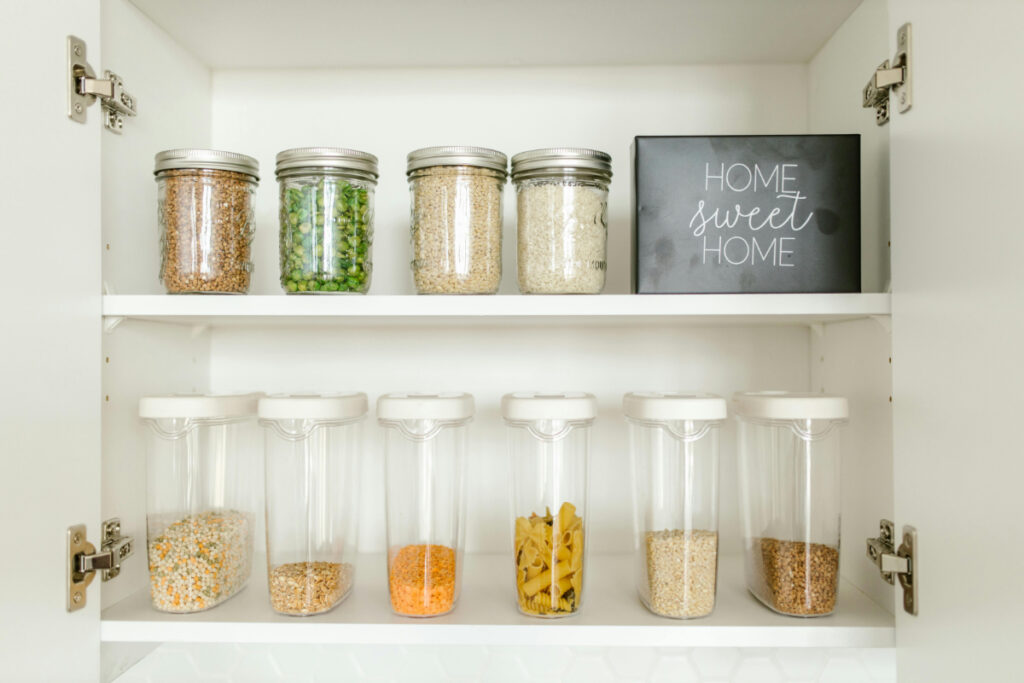
Ideas and Helps for Meals Using Home Food Storage Items
There may be times when we need to use home food storage to provide meals for our families. These times need not be because of major physical disasters such as earthquakes or hurricanes but may be necessitated due to transportation interruptions from strikes or gasoline shortages or plant and animal diseases limiting the availability of various products like vegetables, eggs and meat. It could even be personal disasters such as illness, accident, or unemployment. It is in these times that knowing how to make some meals from food storage is not only useful but necessary.
These meals can also add variety to what we usually eat and help rotate our storage by using older supplies and then replacing them. It can even be fun to make some of these things as well as educational. Here are some tips and ideas on how to use our storage and some common items that may be very useful.
Some helpful items to have that have a reasonable shelf live include:
canned tuna
canned chicken
canned vienna sausage
salt
flour
granulated sugar
baking powder
baking soda
mustard
ketchup
dehydrated potato flakes
rice
complete pancake mix
various spices
dry gravy mixes
dry (powdered) milk
vinegar
knox gelatin
cocoa
bouillon (chicken, beef)
vanilla
canned fruit various soups (dry/canned)
freeze dried meals
Some substitutes that can be used:
egg : combine 1 teaspoon unflavored gelatin with 3 tablespoons cold water and 2 1/3 tablespoons boiling water (for baking)
: 2 tablespoons water and ½ teaspoon baking powder (for cookies and cakes)
: ½ banana (for baking)
: ¼ cup applesauce (for batter breads, brownies, etc).
brown sugar (1 cup) : 1 cup granulated sugar and ¼ cup molasses
baking powder (1 tsp): ¼ teaspoons baking soda and ½ teaspoon cream of tarter
lemon juice (1 teaspoon): 1/2 teaspoon vinegar
butter (1 cup): 7/8 cup vegetable oil and ½ teaspoon salt
ketchup / chili sauce (1 cup): 1 cup tomato sauce, ½ cup sugar, and 2 tablespoons vinegar (cooked mixtures)
use rice in lieu of potatoes
use ketchup as the base for spaghetti and pizza sauce ( added other spices etc)
Making yeast (here are two ways of many)
1 How to Make Yeast Using Flour and Water
Ingredients
– ¼ cup whole wheat flour or white flour
– ¼ cup water
Items You’ll Need
– Small bowl
– Spoon
– Lid or towel
Instructions
Add equal parts of flour and water to your bowl and mix until well combined. The water helps activate enzyme amylase, breaking down the starch into sugars for bacteria and yeast to eat. Next, loosely cover the flour and water mixture with a towel or lid and leave it on your kitchen counter. You can keep the mixture at room temperature but opting for an averagely warm spot will hasten the process of yeast colonizing the batter. Lastly, add one to two tablespoons of water and flour to the mixture in the morning and evening. By doing this for three to five days, you will be feeding the yeast, which will cause it to start bubbling. Note: The gas produced will have caused the yeast to double in size and be ready for use by the fifth day.
Tips:
– Test if your starter is fully ready by seeing if it floats in water
– If you don’t use all your yeast right away, feed it every day or once if you choose to refrigerate it
How to make yeast using potatoes
Ingredients
– 1 unpeeled medium-sized potato
– 4 cups warm water
– 1 teaspoon salt
– 1 teaspoon sugar
Items You’ll Need
– Masher
– 1-quart jar
– Lid
Instructions
First, wash the potato to remove dirt. Be careful not to scrub off the skin. Next, cut it into small pieces and boil until perfectly cooked through. Once cooked, drain the potato pieces and save the water. Here, add salt and sugar to the cooked potato pieces and mash. Using a masher will make your work easier, but you can also use a wooden spoon. Once evenly mashed, set aside the potatoes to cool to room temperature. Stirring the mash will speed up the cooling process. Now, add water to the mash such that the potato and water mixture equals a quart. Cover with a lid and allow the mixture to ferment in a warm place for several days, and your yeast will be ready.
Here are just a few ideas of things that you can make. The purpose is to get you thinking of what you can make with the items that you have.
biscuits and gray
bread and rolls
cakes
cookies
corn bread
pancakes
mashed potatoes
oatmeal cereal
pasta (various kinds)
pizza
waffles
canned soups (various)
using items from freezer:
BBQ meat in crock pot
hamburger helper
tuna helper
stroganoff
hamburgers
hot dogs
fish sticks
frozen meals of all kinds
other ideas:
hash using potatoes, any vegetables (home grown, canned, frozen), meat (vienna sausage, canned chicken, hamburger).
Hawaiian hay stacks using rice, canned chicken, canned mushrooms, canned corn, canned Mandarin oranges, chicken cream soup
The idea is to look at what you have and come up with meals that you and your family would eat. Be creative. Doing this before it is needed will greatly reduce anxiety and worry. You know that you will be able to care for and feed your family. That brings peace of mind. Don’t worry about everything that you possibly might need. Work with what you have. Your thoughts and preparation will be blessed. Do what you can and slowly build a supply of various item to enhance your meals. Overtime you will be surprised at what you can do. Try not to be discouraged. Remember doing something, anything no matter how small is better than doing nothing at all. You will be blessed for your efforts. Good luck in your planning and preparation.

Emergency Preparedness Plan for Pets
Many of us have pets from cats and dogs to birds, rabbits, and hamsters. They become an integral part of our family. They are loved and give love and companionship. It is sad when we lose them and we grieve. Because they are part of the family they too need to be cared for during an emergency.
In many ways it is just like preparing anyone in the family for such an occurrence. They too need an emergency preparedness plan designed for them. To make a basic plan (obviously things need to be added or deleted depending on the type of pet you have) you should:
Make sure your pets wear collars and tags with up-to-date contact information.
Microchip your pets.
Keep a leash and / or carrier near the exit with identification on it.
Make sure you have proper equipment for pets to ride in the car.
Plan where you and your pet will stay in case of evacuation. Pets may not be allowed in
local shelters unless they are service animals. Identify shelters or out-of-town
friends or relatives where they can stay. Locate longer term boarding facilities.
Create a buddy system with neighbors in case you are not home during an emergency.
Find a veterinarian in the area you will be staying during the emergency.
Prepare a Pet Emergency / Disaster Kit. It should contain:
Food and water for a least 2 weeks.
For cats: litter box and litter.
For dogs: plastic bags for poop.
Medications for a least 2 weeks.
Medical records including record of vaccination for rabies and other diseases,
prescription medications, and medical history.
Photocopied registration information (ex: proof of ownership or adoption records).
Pet description(s) (ex: breed, sex, color, weight)
Recent photographs of each of your pets
Waterproof container for documents.
Non-spill food and water dishes.
Manual can opener.
Feeding instructions for each animal.
Toys.
Pet first aid book and first aid kit.
Cleaning supplies for accidents (paper towels, plastic bags, disinfectant).
Sturdy leashes or harnesses.
Microchip number, name and number of microchip company.
Contact information (cell phone, work phone, home phone) of owner and close
relatives or friends.
Practice Evacuating your pet.
Train your pets to get in and stay in their carriers by making it a comfortable place.
Practice transporting your pet by taking them for rides in a car similar to the one you would be using to evacuate.
Know where your pet might hide when stressed or scared. Practice catching your pet if needed.
Have your entire family practice evacuating with your pets so everyone knows what to take, where to find the pets, and where to meet.
If sheltering in place (at home):
Make sure the room chosen is pet-friendly.
Select a safe room, preferably an interior room with no (or few) windows.
Remove any toxic chemical or plants.
Close off small area where frightened cats could get stuck (such as vents)
Diseases can easily spread between pets and people during an emergency, so:
Wash your hands after handling your pet, its food, or waste.
Do not let your pet lick your face or hands.
Keep your pet up to date on all vaccinations.
Practice safe handling or your pet because your pet may behave differently during
a stressful situation.
Keep you pet in a carrier or on a leash.
Do not allow you pet to interact with other animals, especially wildlife and stray animals.
Properly clean and disinfect cages and litter boxes. Wash pet’s bedding regularly.
Avoid stagnant water, especially after flooding
Don’t allow pets to play in or drink contaminated water.
Remember, during a disaster, what is good for you is good for your pet. If you leave your pets behind they may be lost, injured – or worse. Never leave a pet chained outdoors. Up to 600,000 pets where injured, lost, or killed during Katrina (the Hurricane that hit Louisiana). This information came from several sources including the American Red Cross and the CDC. Like everything with emergency preparedness you need to tailor this plan to the needs of your
pets and family. Yes, this may seem like a lot and takes some time, work, and energy but in the long run is well worth it. However, everything does not have to be done at once just work on it the best you can and over time it will be completed. Keep in mind: doing something, anything no matter how small is better than doing nothing at all. It just may be that one thing that you have done is what was needed at the time. Good luck in all of your efforts.
Emergency Preparedness 2024
A New Beginning / A New Year’s Resolution
Ideas with Little Cost and Time
When you look at an overview of all of the things that emergency preparedness entails it becomes quickly clear that it is a daunting task. You are overwhelmed and feel that it is too much to do. Perhaps like many, you throw up your hands and quit even before you start. It is too complex, takes too much time, takes too much room, and costs too much so why do it? So we often put it aside and move on with our regular lives and other pressing issues and forget about it. It is not until something happens, like the earthquake in Magna a couple of years ago, that it crosses our minds. By then it may be too late to prepare and be ready.
To help with this feeling and become a little more prepared here are some ideas that you can use. They are divided into three groups, those that have no cost to do, those that have little or no cost, and those that are low cost. Many of these don’t take much time either. However, if you do them you will be on your way to self sufficiency and emergency preparedness. This is not an all inclusive list but gives you a sample of things that can be done. All of these things become part of your personal preparedness plan.
Remember you don’t have to do everything at once. By being persistent and diligent in doing them over time you will see great results. We are blessed not only by how much we have and where we are in the process but by participating. Our willingness to try and the efforts we take are the basis of the real blessings that we receive.
To use this list, peruse it, pick one of the things to do and then do it. Do this on a regular basis for best results. You could pick and do one once a week, or one every other week, or even one a month. Perhaps working on this list can be one of your New Year’s resolutions. You will be surprised at the end of the year on how much you have done and much better prepared you are than you when you started. Always remember doing something, anything no matter how small is better than doing nothing at all. Good luck in all of your efforts.
No Cost:
Designate a meeting place for the family outside of the house.
Find a contact person outside the area (preferably outside the state), all family members contact this person in an emergency. They can coordinate communication.
Check all flashlights to insure that they work.
Put flashlights in a location easy to find in the dark.
Check all smoke detectors.
Check all carbon monoxide detectors.
Find a recipe that can be made using with food storage items.
Make a list of non-cook meals.
Make an inventory of emergency preparedness items you have.
Make an inventory of food storage items.
Find a place in the house to store cash.
Find and read an emergency preparedness scripture / story such as Noah, Joseph in Egypt, or the Brother of Jared crossing the sea.
Make an emergency phone list and put it in an easily seen place.
Find and prepare a shelf or similar place for storage.
Store a bottle of water.
Find and watch a short video on preparedness.
Make a list of emergency preparedness resources found on the internet.
Make an escape route plan for each room in your house.
Practice using the escape route plan.
Make a list of things to include in a 5 day kit (increased from 72 hour kit)
Read an article about emergency preparedness on the Be Ready Utah website.
Locate the nearest urgent care facility and hospital in your area (including pharmacy)
Make an exercise program for physical fitness.
Exercise using that physical fitness program.
Prepare a household budget.
Save some lint in a plastic bag to use as a fire starter.
Take a picture of each room in the house.
Make a short medical profile of each person including medications needed, allergies, and other information.
Build a prescription drug storage. Order a refill with when a couple of doses still remain and then save those couple of doses (from the new refilled prescription). Over time build a storage of medications.
Little or No Cost (depending on what you have at home)
Cook a meal in a dutch oven.
Cook a meal on a propane or butane stove.
Get or build a first aid kit (any size).
Prepare a boil in the bag meal.
Get or make a “piggy” bank for emergency preparedness.
Get a container to store water in.
Grow a tomato plant.
Learn to make a shelter (tent) from ropes/cords and a tarp.
Make a “Go Bag”.
Take a first aid class (could be online).
Get hand sanitizer packets or small bottles
Get free Covid 19 test kits
Put a pair of socks in clothes storage.
Put a copy of the Book of Mormon in Storage.
Put writing pad or journal in storage.
Put an Ensign and/or the Friend in storage.
Put a candle in emergency storage.
Add a game to storage for needed entertainment (eg cards like Rook, Old Maid etc).
Put a tooth brush into storage for each person (Dollar Tree).
Put a cross word book, Sudoku, word search book into storage (Dollar Tree).
Put aside one roll of paper towels or toilet paper.
Minimal or Low Cost:
Buy an extra can of food.
Get an additional bag of charcoal.
Set up a savings account for emergencies and preparedness.
Put a dollar in emergency preparedness money storage or savings.
Get a fire extinguisher for the kitchen with appropriate ratings A,B,C so can use on grease fires.
Buy a pack of batteries (any size AAA, AA, C, D).
Buy an envelope of vegetable seeds to plant.
Send a “Thank You” card to someone.
Pay your tithing and offerings.
Get some hand warmers.
Buy a package or can of freeze dried food.
Get or build a small sewing kit.
Get an emergency blanket (space type, looks like aluminum).
Get a cheap plastic poncho.
Get a 10, 15, 25, 50 length of cord or rope.
Get a multi-tool pocket knife.
Learn CPR.
Get some extra pencils, pens, and pads
Get a coloring book with crayons (good for kids with nothing to do in an emergency).
Get a battery or crank operated radio.
Download or find an outline for a family emergency preparedness plan (one is on the Sandy City website)
Get a box of waterproof matches.
Get a package of plastic utensils.
Get an extra pair of reading glasses.
Save an old pair of glasses that can be used in a pinch.
Holiday Preparedness
The holiday season is looked forward to with much anticipation. It is a fun, exciting, and enjoyable time of the year that is shared with family and friends. In fact many people regard it as the most wonderful time of the year. Just because it’s a time where people are kind, generous, and show brotherly love and charity does not make it immune from emergency or even disaster. It has its own special and unique dangers that need to be planned for like any others throughout the year. Even though many of them are personal in nature they can, at times, cause difficulty and real hardship for their families, friends, and even neighborhoods. Let’s consider some of the most common.
Fall related injuries, usually from ladders while decorating. Some 160 such accidents
occur each day during the holiday season. Half of them lead to broken bones and worse.
Check ladders for broken steps and worn parts. Have some one help by holding the
ladder. Hint: for every four feet in height you go up move the base of the ladder one
foot away from the wall.
Toy related injuries ranging from choking on small parts to broken bones and head
injuries from crashes on scooters, bikes, skate boards etc. In 2020 emergency staffs
across the country treated 150,000 toy injuries in children 14 years old and younger with
non-motorized scooters accounting for 28% of them. Make sure to read all instructions
and follow safety guidelines. Use helmets and other protective gear.
Fires. Most are started by burning open flamed candles, Christmas trees, overloaded
electrical outlets, and unattended stoves. Never leave the room where candles are
burning. Fires can easily and quickly get out of control. The consequences could
greatly affect your family (house burning done, death) and your neighbors. There is
always the potential that the fire may spread to their houses as well. Water real tress
frequently and look for fire resistant artificial trees. Spread your lights etc among
several different outlets on different circuits.
Car accidents are a major concern during the holidays. Many people are out on the
roads traveling to different events and activities. The increase in number of people on
the roads alone increases the risk of accidents. In addition alcohol consumption is
greater where people who rarely drink may do so at this time. The National Safety
Council estimates that more than 600 people die on the roads surrounding Christmas and
New Year’s Eve. To prepare, buckle up, drive defensively, avoid driving distractedly
and fatigued. Again this type of risk can become an emergency that affects not only you
but many others and their families as well with injury or death and its consequences.
Cutting yourself with scissors and knives when wrapping and unwrapping gifts
especially when done in a hurry. Remember to always cut away from you and any one
else so if you slip you don’t stab or cut yourself. Taking time and being cautious can
save pain and grief. Have an updated first aid kit nearby when using these types of
tools.
Food and allergy issues become more frequent. Food poisoning happens too frequently
often caused by food being left out too long at parties and buffets. Perhaps worse is the
risk of allergic reactions. You may not know what is in unfamiliar foods. Be wary and
have your epipen available. Also eat early at parties when the food is first placed out.
Medical emergencies includes burns from various activities such as food preparation,
strained backs, and even heart attacks to name a few. Some of these can be prevented by
using your legs to lift heavy objects and not twisting when lifting them especially
overhead. Pot and pan handle should be turned toward the stove instead of out from it
where children and others can pull hot contents down on them. Others, like heart attacks
are unpredictable and seem to happen at random without warning. In these cases first
aid knowledge, CPR training, and knowing how to contact emergency responders is
imperative. Take classes, practice, and learn all you can.
There are many other emergencies that may occur. These are only a few of the most common.
As you can see many of them can be prevented and responded to with common sense. A basic
first aid kit, fire extinguisher, and means of communication along with a small first aid book,
and emergency food supplies may prove to be invaluable and should be part of your personal
and family’s preparedness.
You can enjoy your holidays without undue worry if you just take a few minutes to prepare
before hand. You don’t have to become overwhelmed trying to do everything at once but
Always remember doing something, anything no matter how small is better than doing
nothing at all.
Then Enjoy the holidays and the festivities.
Fuel Storage
Fuel is another important thing to consider in our emergency preparedness plan. Fuel and alternate forms of power may become very important for warmth, cooking, light, running medical equipment, refrigeration (for food and medicine), as well as operating household equipment such as lawn mowers, chain saws, and other useful equipment even generators.
There are several types of fuel that could be stored. Each has it own characteristics and benefits. Not all are needed in your storage. Keeping your family’s needs in mind and the places you have available to safely store fuel will help you select those that are right and best for you. Special care is required for all types of fuel. With this in mind fuel can provide you with convenience, comfort, and even life sustaining support.
Common types of fuel that are often stored and used include:
- firewood
- charcoal
- alcohol
- biomass briquettes
- gasoline
- kerosene
- propane
- butane
- gel fuel
- and even pine cones
The following synopsis may help you decide which make sense for you.
Gasoline: (liquid)
- Common uses: chain saws, running generators, lawn mowers, cars for possible evacuation
- Store
- Containers:
- Safety metal can with self-closing lid.
- Metal cans with tight fitting lids labeled gasoline.
- Red plastic cans made and designed for gasoline.
- Never in glass bottles of any kind.
- Add a couple of ounces of fuel stabilizer per 5 gallons. Will help keep usable for a year.
- Keep in a well ventilated area not in direct sunlight or near heat sources.
- Reduce pressure of ballooning can by carefully removing the cap and allow fumes to escape.
- Avoid static electricity. Do not store on carpet or other material that generates static electricity. Wooden shelves are a good surface.
- Containers:
- Amount to have on hand should be only the amount needed for maintenance purposes and operation of equipment. At most this would be 25 gallons. However, many city and county ordinances allow and recommend 5 gallons unless you have special equipment and facilities built with enough space between buildings.
Diesel and Kerosene Fuel: (liquid)
- Common uses: stoves, heaters, lamps
- Store:
- Containers:
- Safety metal can with self-closing lid.
- Metal cans with tight fitting lids labeled gasoline.
- Red plastic cans made and designed for gasoline.
- Never in glass bottles of any kind.
- Keep in a well ventilated area not in direct sunlight or near heat sources.
- Avoid static electricity. Do not store on carpet or other material that generates static electricity.
- Containers:
- More stable and less risky than gasoline.
- Amount to have on hand 10 gallons. As with gasoline there are city and county ordinances that need to be followed.
Propane and Butane: (pressurized gas)
- Common uses: cooking, light, heating, hot water
devices,
- in addition butane used for lighters, and cordless hair irons
- Store:
- Containers:
- Original pressurized bottles
- DOT cylinders
- Commercially filled canisters designed for grills and RV’s
- They are relatively safe to store especially in comparison with liquid fuels.
- Containers:
- Butane versus Propane
- Scientifically one of the main differences is their respective boiling points. Propane has a much lower boiling point -42 degrees centigrade while butane has a boiling point of -0.4 degrees centigrade. The means that propane performs much better in cold weather and can be stored outside in cold temperatures.
- Butane is about 12% more efficient than propane when used as fuel.
- Butane gas cylinders are safer to use indoors. Butane stoves and equipment require some ventilation. Propane should never be used indoors.
- They have an indefinite shelf life. Many people have successfully used them after twenty years of storage if the containers are intact.
Hard Fuels: (firewood, briquettes, charcoal, pine cones, even tightly twisted newspaper)
- Common Uses: heat, light, and cooking
- Store:
- in buckets (usually the easiest way for many of these fuels).
- In boxes or some in stacks outside
- Pros and Cons:
- They are not as easy to use as propane or butane and may need preparation such as drying, or baking (bake pine cones at 250 degrees to melt resin and eliminate insects). Need cleanup of embers and ashes after use.
- They are the cheapest and safest to store.
- They work well in wood burning stoves, fireplaces, fire pits, and grills.
- They are not as efficient as many other fuels. It was estimated that it would take fifteen 20lb bags of charcoal to cook one hot meal a day for a year.
- Interesting tidbit: after you use briquettes / charcoal to grill. If you remove the large chunks put them in water to cool then take them out and let them dry, they can be used again. One person reported that the used briquettes started much easier the second go around than the fresh new ones.
Another source of power or fuel is battery and battery banks. There are many different kinds and sizes of these. Some are very small and can recharge an ipad or a phone. Some are huge and can provide for the electrical needs of strategic services like hospital operating rooms and bridge the needs until backup generators can be started and put online. They can be charged by various means including solar power. The one or ones that may be right for your depend on your needs for running medical equipment and refrigerators for medicine and the like. It could be used for critical communication via radios and cell phones. Only you understand what you need in your circumstance. I would guess everyone needs something in this area. Take some time to analyze your needs.
Finally, a clean and safe type of “fuel” is solar devices and panels. Here sunlight is directly used to provide electricity for various uses. This can be costly but is available and works as long as the sun shines. Many systems are connected to backup storage in the form of batteries and other systems so power is available when there is no sunlight.
Though fuel is necessary for storage and self sufficiency or self reliance there are local ordinances that must be taken into account and followed for public safety. For example American Fork allows 5 gallons of flammable liquids such as gasoline and Coleman white gas; 25 gallons of flammable gas (propane, butane), and 10 gallons of diesel / kerosene / lamp oil (combined). Orem’s ordinances are nearly identical. Sandy also has some of the same type of ordinances. The point is that these regulations need to be followed. Thus you need to know them before you begin storing fuel.
Note none of the restrictions I found in various municipalities and political entities had rules relating to hard fuels directly. There seems to be no specific restrictions on them.
Another thing to plan is the rotation of stored fuel. Many people rotate their entire stock on an annual basis. This is probably needed for some of the liquid fuels but not all of the gas or hard fuels which have a longer shelf life.
Digesting all of this information along with understanding the needs of you family will lead you to the best decision on fuel storage for you and how much you need to have for use in emergency situations.
Good luck in starting your fuel storage and remember doing something, anything, is better than doing nothing.
Stake Emergency Preparedness Information for 2023
The information below comes to us from our Area Authorities and Stake Emergency Preparedness leadership. This information is vital for all members of the stake to access in case of emergencies, including floods, that might occur in our area over the coming months.
Preparedness Articles Archive
Articles by Brother Shaun Moyes and Sister Renee Packer
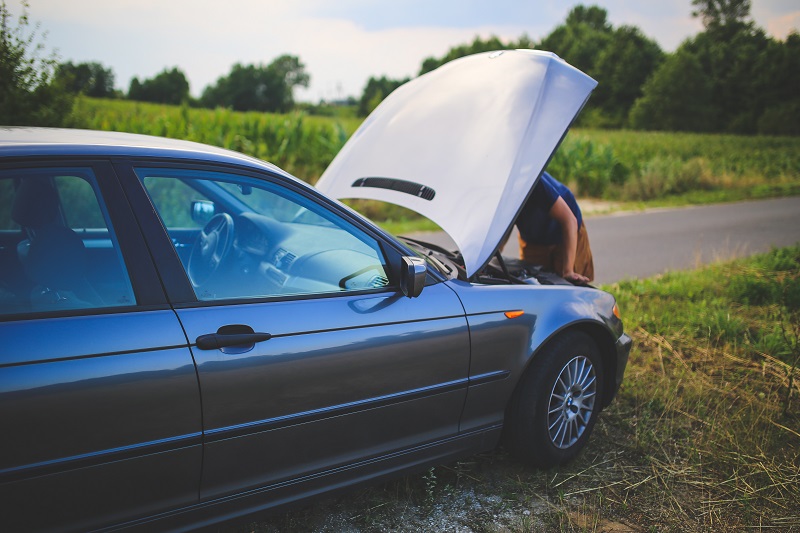
Vehicle Emergency Preparedness
Summer Version
September 1, 2019
For issues like flat tires, accidents, running out of gas or any other problem that would leave us on the side of the road, visibility equipment is smart. This includes reflective hazard triangles and flares. If you do need to pull off the road, be sure to move as far as you are safely able to give you room from passing traffic. When tying down loads in a trailer or truck bed, consider putting the ratchet ends and knots on the passenger side of the vehicle. This will allow the car to be a buffer and create space between you and passing traffic as you make adjustments, re-attach or tighten ends that may have come loose.
August 24, 2019
Winter emergency preparedness was a topic covered in December. Part of the message dealt with our vehicles. Although many of the winter concerns are non-issues during warmer months, things can still go wrong. Being prepared can be a huge advantage. If you find yourself waiting on the side of the road for assistance, summer weather can create big problems.
Keeping a blanket in the car year round is a good practice. While keeping you warm in the winter, a blanket can block you from the sun in the summer. An emergency reflective blanket may also be a smart item to keep in a vehicle for this purpose.
Water is a must have in your vehicle at all times. When planning a road trip, it has been said that a gallon of water per person fair. Snacks are also a great idea.
Current model cars are highly complex now days and popping the hood does not always allow us the opportunity to find a fix. That being said, a small tool kit may get you back on the road. Adjustable wrenches, duct or Gorilla tape, screwdrivers, pliers and a flash light (headlamp is even better for hands-free action) are all items that should be in a kit. A first aid kit should be in the vehicle as well.
For issues like flat tires, accidents, running out of gas or any other problem that would leave us on the side of the road, visibility equipment is smart. This includes reflective hazard triangles and flares. If you do need to pull off the road, be sure to move as far as you are safely able to give you room from passing traffic. When tying down loads in a trailer or truck bed, consider putting the ratchet ends and knots on the passenger side of the vehicle. This will allow the car to be a buffer and create space between you and passing traffic as you make adjustments, re-attach or tighten ends that may have come loose.
Finally, jumper cables are always going to get used sooner or later whether you are the one in need or the one saving the day. Fix-a-flat is also an item becoming more popular these days. These are cans with both air and sealant that can fix most small punctures less than 1/4 inch in size and may get you to a garage for further assessment or a tire plug. Like the jumper cables, this is an item that may save you or it may allow you to save someone else. Keep a tire gauge in your glove box while you are at it and check your tire pressure before driving or after tires have cooled down.
Think about past experiences of your own and those you know and add to this list what you feel might be of benefit. On Sunday an experience was shared with me that included a failed radiator, a flat tire, a broken AC unit and one other issue that I can’t remember. All of these were in the same week on different vehicles in the same family. Some of these left the owners stranded in the heat until help arrived. Fortunately the family has AAA which might also be something to add to your list.
Good luck and best wishes on your summer commutes and adventures. Travel safe and take measures to be prepared for the unexpected.